Hello everyone! It's been quite the crazy month. First off, big news. I'm ENGAGED! My wonderful boyfriend of 3 years, Caleb, proposed this weekend. Both of our families are thrilled. Caleb actually went the old fashioned way and asked for my father's permission (which he was more than happy to give). I've been looking at this beautiful ring ever since and thanking God for this wonderful event in my life.
On to this month's mini album! When Bo Bunny released images of 'Forever Fall' at CHA, I fell completely head over heels. I love the bold, rich colors of it. The deep reds, golden oranges, and vibrant aqua just seemed to pop out at me. As soon as I could, I bought one of everything. I knew I wanted something that could be set out for Thanksgiving, so it needed to be able to be completed before Thanksgiving actually arrived. So I opened up my old photo folder and grabbed a couple of pictures that spoke the most to me. I did a page on friends, love, puppies, family, and creativity. What resulted was such a rich colored mini album that looked great on the table.
I used all Bo Bunny papers and embellishments for this mini album. The small leaves and letters were all cut out using the Vintaj Sizzix and assorted die cuts. I used the Cinch to bind my mini album and some ribbons from Michaels. I also used Tim Holtz's seasonal distress ink in Broken Twig to go around all the edges of the mini album. I loved adding the burlap fabric and twine that my FMIL had in her stash. I hope everyone enjoyed this mini album and I hope you all get a chance to get your hands on these gorgeous papers!
Showing posts with label Fall. Show all posts
Sunday, November 20, 2011
Tuesday, October 25, 2011
Our Pumpkins-American Crafts Nightfall
When I was younger and still living at home, I used to trick-or-treat every year. It was something that I would look forward to all year and would plan in great detail. Then, when I got a little older, I began decorating the house. You could see our house for miles around. But once I hit 16, it was no longer considered 'appropriate' for me to trick-or-treat so I just focused all my attention on decorating. Now that I don't live at home anymore, I don't have a house to decorate. It almost feels as if Halloween is now out of my reach. So I made up my mind this year. I decided that I would do everything I could to enjoy Halloween. So my friend Morgan and I tried our hand at pumpkin carving. I was loads of fun and definitely something to put in the scrapbook album.
There are a couple of Halloween lines out there that I just can't get enough of. American Crafts' "Nightfall" collection is one of them. The Nightfall collection has two parts to it. One part is mostly fall and the other is mostly Halloween. Since I knew I wouldn't be trick-or-treating any time soon, I bought the fall side. It still worked really well with my photos and theme. I love the light tone of blue that this kit uses. It's such an unexpected punch of color.
I love the little rosettes that I got, but I really wanted to find a place to use the Jack-o-lantern brad. So I removed the little black button that originally came with it and replaced it with the brad using glossy accents to secure it. The thicker letters are so cute and fun. I love the skinny yet tall feel of them. The only thing is, it's a bit of a pain trying to arrange your stickers without sticking them down. All the letters just wanted to tangle on each other. I finally had to just push them aside and stick them down without any guide or arranging beforehand.
I cut strips from the Fall Colors paper to make a border around both pages. I am just in love with these colors! The little black owl patch brought over the black from my photos and title from the other page. A little bit of leaf garnish and I was done. I made sure to run all the edges using Tim Holtz's "Gathered Twigs" ink. I absolutely love his seasonal colors. Make sure to grab some because they won't be around for too long. They will not be added to his regular colors. I hope everyone enjoyed this layout. It's been a while since I've done a two page layout, but I really had fun.
There are a couple of Halloween lines out there that I just can't get enough of. American Crafts' "Nightfall" collection is one of them. The Nightfall collection has two parts to it. One part is mostly fall and the other is mostly Halloween. Since I knew I wouldn't be trick-or-treating any time soon, I bought the fall side. It still worked really well with my photos and theme. I love the light tone of blue that this kit uses. It's such an unexpected punch of color.
I love the little rosettes that I got, but I really wanted to find a place to use the Jack-o-lantern brad. So I removed the little black button that originally came with it and replaced it with the brad using glossy accents to secure it. The thicker letters are so cute and fun. I love the skinny yet tall feel of them. The only thing is, it's a bit of a pain trying to arrange your stickers without sticking them down. All the letters just wanted to tangle on each other. I finally had to just push them aside and stick them down without any guide or arranging beforehand.
I cut strips from the Fall Colors paper to make a border around both pages. I am just in love with these colors! The little black owl patch brought over the black from my photos and title from the other page. A little bit of leaf garnish and I was done. I made sure to run all the edges using Tim Holtz's "Gathered Twigs" ink. I absolutely love his seasonal colors. Make sure to grab some because they won't be around for too long. They will not be added to his regular colors. I hope everyone enjoyed this layout. It's been a while since I've done a two page layout, but I really had fun.
Friday, October 7, 2011
Day 7: The last Day
Today I have a nutty little treat bag for you today. No, really... it's full of nuts!
I thought it would be fun to make a goody bag. I filled it with Pumpkin seeds, almonds, and pistachio nuts. I debated whether to put them in a clear bag or a brown bag. The brown bag just looked a little more 'fall-ish' to me. Once again, I dived into my scrap stash. (This whole week has worked wonders on my scrap stash!)
Firstly, I cut a piece of scrap paper to fit the size of the bag top. I then went around the edges with a Fiskar's punch. I dug around for some brown lace that I bought from Hobby Lobby. I wrapped it around and tied it in a bow on top.
The sentiment was typed using Adobe Illustrator and then punched out with a 1 1/4 punch. I then backed it with the Glassine paper and some more scrap stash.
I hope everyone enjoyed this fun little treat bag today. Maybe this is something that might be fun for the family to make together before a nature walk this fall? Or maybe you just want to bring a smile to some co-workers? No matter what you use them for, they will definitely make your day a little nutty.
Thursday, October 6, 2011
Day 6: Tag it!
Hello everyone! Hope y'all are having fun. For today, I have a quick and fun way to use up that scrap stash. Tags! Tags are such a versitile craft. You can use tags as bookmarks, decorations, and gift tags. Today I have two different tags to show you.
Tag 1
On this tag, I used a stamp from TPS studio stamped with Staz-on ink. I used a little of Tim Holtz's Kraft Glassine paper to give the stamped sentiment a border. The Glassine really was a little tricky because the only thing that would adhere to it was glossy accents. The little pumpkin was cut out from K&Co's fall adhesive borders (I just loved the glitter on it!). Then, I used pop dots and a fiskar's scalloped punch to give it a little 'oomph'. I finished it off by going around the edges with Tim Holtz's distress inks in 'Ripe Persimmon'.
Tag 2
This tag was really fun. I cut a tag out of basic kraft paper with the vagabond that I then covered with Goosebumps. I let that dry and then rubbed on Distress Ink in 'Ripe Persimmon'. Once that dried, I sprayed Goosebumps again. 'Barn Door' was then rubbed around the edges. While that was drying, I used the same 'Barn Door' ink to stamp another TPC stamp. The leaf was made using yellow paper that had been rubbed with the same two distress inks. I added the crackle paint in 'Clear Rock Candy'. Then I went around the edges with Perfect Pearls. I liked the look of the Gold Perfect Pearls so much that I stamped over the background with a leaf stamp and used more on it.
Hope everyone enjoyed this today! I definitely had fun playing with the Glassine paper and the Goosebumps. I'm eventually going to get a hang of this stuff. LOL. Have a safe and happy Thursday and I'll see you all tomorrow!
Wednesday, October 5, 2011
Day 5: Count your blessings everyday
When the fall leaves start to change and my days are filled with warm sunshine and a cool breeze, I begin to thank God for every blessing I have. I know that Thanksgiving is when society tells us to be thankful, but what's wrong with showing it everyday?
This is a fun project to get the entire family started on. Each bag starts out with "I am thankful for..". Have your family take turns picking a bag and writing what they're thankful for. When you have finished writing what you want to say, fill the bottom of the bag with a little sand. The sand helps keep your candle from moving and also acts as a fire deterrent should any hot wax drip down. For medium to large bags, you might need more than one candle. Remember: When using candles, never leave them unattended!
Luminaries are very fun to make and there's nothing as beautiful as driving by on a night and seeing them lit up in a window. You can make luminaries as different as you want. How about some black Halloween images for a spooky luminary? Or laying down a couple of leaves and spraying over them with some colorful mists for a different fall approach. The possibilities are only limited to your imagination. Today I want you to stop and look at your life. What are you thankful for?
Hope everyone had fun today. Thank you for stopping by. I also want to thank everyone who have left such sweet comments. I am very grateful. Each time I log onto my email and read each one, it definitely brings a smile to my work day. If anyone hasn't already, make sure to click 'Follow' in the right column. :) Have a happy Wednesday!
Tuesday, October 4, 2011
Day 4: Show your door some love
Good morning everyone! Hope everyone has a happy Tuesday. A couple of weeks ago, my FMIL (Future Mother-in-Law) and I went to a couple of stores to see about getting a wreath. The ones we liked were $200 or more. Yikes! There's no way we would pay that much for something that would go on the door only once a year. So, we started looking at the cheaper priced wreaths. They were so plain and empty. So, we decided to make our own.
We went to our local Michael's and bought a plain wreath (a big $2.50). We then checked out the floral department and came across some bright and fun leaves. We bought 5 of them (so we could have extras for later). The gorgeous ribbon was just perfect and actually came in two colors, an orange and a brown. We thought the orange blended in too much but the brown looked perfect.
We wanted to be able to change this wreath constantly so it wouldn't be stuck in the attic for the rest of the year. So, none of the stuff is actually glued on. The floral bouquet was cut up like picks and they were simply inserted into the wreath. The ribbon was wrapped around and a simple wire held it all in place.
Here's what it looks like on the front door. Isn't it so cute? And it barely cost us $30. Next time you're in a store and tempted to buy that ready-made piece, step back and think about it. You might just have fun doing it yourself.
Monday, October 3, 2011
Day 3: Branch out of your comfort zone
Anyone who knows me will also know that I am NOT a seamstress. lol. With that being said, I challenged myself to make at least one sewn project. It's nothing grand, but it was completely new to me. To start off, I printed my material on my ink jet printer.
To print using your inkjet printer:
- Iron your fabric
- Spray Adhesive spray evenly on a regular sheet of computer paper (pay close attention to the edges as these will become unglued the fastest.
- Attach the paper to the back of your fabric.
- Now that the paper and cloth are stuck together, Iron on high heat.
- Make sure that you iron on BOTH sides.
- Trim the excess from around your paper as close as you can get it.
- Run it through your printer like you would print normally.
- Peel back off and enjoy!
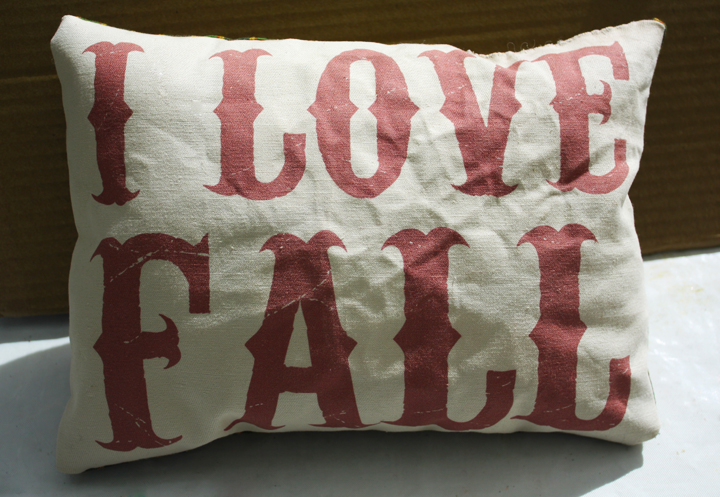
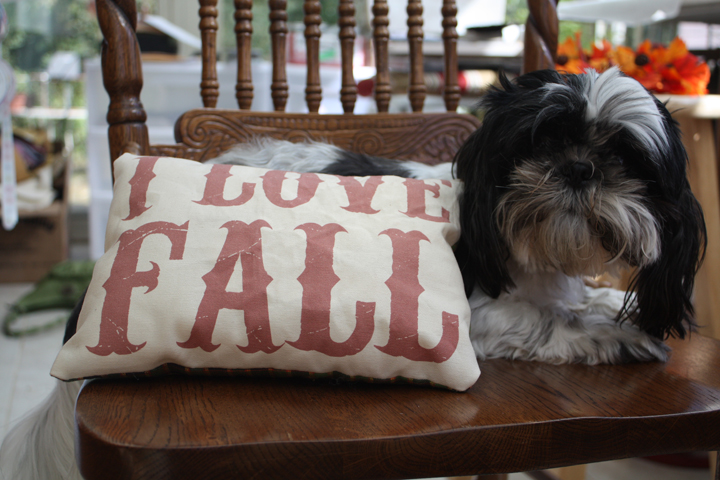
I ran my pillow through the sewing machine inside out leaving a hole at the top. I then used the hole to turn the pillow right side out and stuff it. Then I hand sewed the hole up. It's far from perfect, but I'm very proud of myself. This is my first ever pillow! Jada did not seem to pleased at becoming my model though. :)
I hope you all enjoyed today's post. Your challenge today is to do something that you're uncomfortable with. It will open your horizons a little more. (If not, it will at least turn into a very funny conversation for later.) I appreciate each and every person who has joined in and want to say thank you again. Have fun and don't forget to become a follower!
Sunday, October 2, 2011
Day 2: Send a smile through snail mail
Today we'll be continuing with the fall fun. When was the last time you sent snail mail? You know, the old kind with the envelope and stamp? :) Well, why not do it one more time? All I ever seem to get from the post office is junk mail or bills. Every once in a while, my aunt will send me something through snail mail and it's such a pleasant surprise. It really does brighten my day. Your challenge for today is creating a card using only scraps (bonus if it's last year's fall papers) and send it to someone you know. This will clear out some of your scrap stash while putting a smile on someone's face.
This card was made completely out of scraps. I have no clue what any of it is except the yellow paper (that's Tim Holtz's coordinating cardstock). This card is 4 1/2 x 9. I knew I wanted it to be really long to showcase the leaf paper. I inked all of the edges with Tim Holtz Distress Stain in Vintage photo. I love distress stains because it's so easy to run around the edges and more ink comes out.
The letters were cut out using my Cricut and attached using 3D dots. I seriously need to look into some fall cartridges. I'm not even sure if they have any. I use my Cricut a lot. Although, I'm considering buying a silhouette just to have both. There's been a few times that my FMIL has had some cute images.
The leaves were really fun to make and I'm pleased with how they came out. I used the Vagabond to cut out Tim Holtz's leaf die cut. I covered the paper with crackle paint in tarnished brass. While it was still wet, I sprinkled some perfect pearls antique gold on top to give a little more shimmer. After it dried, I attached the leaves to the card using glossy accents.
I hope everyone enjoyed today's card and I hope you'll stop by tomorrow to see what else I've got planned. And don't forget to follow my blog! The button is located on the right side and I would really appreciate it. :::puppy dog eyes::: See you all tomorrow!
Saturday, October 1, 2011
Day 1: Wear a ribbon in your hair
Yay! It's the first day of my Welcome Fall. I want to take some time to say a big THANK YOU to anyone who stops by today to join in. I hope you come back for each day of the fun.
Now, on to our first project. What better way to show your love for fall then wearing some fall themed hair accessories? There's no reason to go overly themed. Just some fall colors here and there (and maybe a feather or two) and you're ready to go.
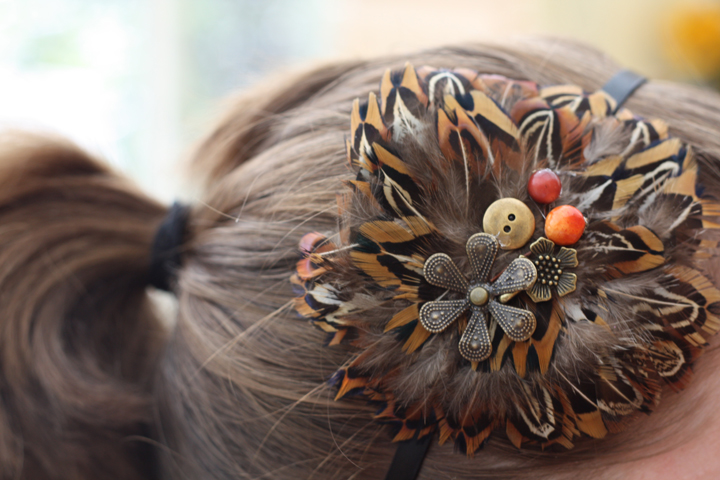
I have to admit. Taking a closeup picture of the side of your head is rather tricky. But I finally got a working closeup. This hairband was made using a plain black hairband. The feathers were actually really easy. Hobby Lobby has some 'Hat Decor'. They're easy pieces that come ready to glue on. Once I hot glued the feather piece on, I simply attached some cute accessories. I wanted it to have a fall feel, but after fall is over I want to still be able to wear it with neutrals and such.
This one was a little more fun. I took a feather pick and cut the feathers off. Then I attached them to a barrette. The top piece was from a Fall candle garland. I just love the playfulness of the colors. The feathers almost blend into the hair, so it gives a really interesting punch without being overbearing. I love wearing unusual pieces like this because they act as great conversation starters. Everyone always wants to know where I got them from.
I hope you enjoyed this bit of inspiration. When was the last time you made your own accessory? Was it for Halloween or for the office? I'd love to hear from you!
Sunday, September 25, 2011
Coming Soon: Welcome Fall!
What is it about the holidays that makes you light up inside? Is it the warm colors of the leaves changing? The smell of pumpkin pie straight out of the oven? Or maybe it's the feeling that holidays are just around the corner? Either way, I'm there with you. In Alabama, our fall is very short. Sometimes it feels like our weather just skips from scorching summer straight into toe-numbing winter. The three weeks we get of fall is very precious to me. It recharges my batteries and helps brace my spirits against the coming winter.
So, I've decided to share my enthusiasm with as many people as possible. For the first week in October, I will be releasing fun fall ideas to kick start your inspiration. I hope you will all stop by to see the goodies and share ideas with me!
On another bright note, I have been chosen as a designer for Papercrafts TV. I am so excited because this is my first ever design team. I'm still anxious to get my hands on their kit and see what fun things I can come up with. Make sure to pop over there and check it out!
Subscribe to:
Posts (Atom)